This post documents a presentation I did at Revit User Group Wellington RUGwell in July 2015 on how to use the Koordinates.com web site to get site contours and boundary information to create toposurfaces and boundary lines. A lot of this information is free!
The fist step is to log onto Koordinates.com. Create an account if you don't already have one.
Contours & Terrain
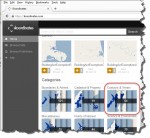
From the Home page, click on the Contours & Terrain Category and then filter the search down to Contours and look for Wellington City 1m Contours (2009). Hit the orange + button to add this information.


It is always worthwhile clicking on the link to view the description and check the license agreement. Note that this information is free to use but you must attribute the creator in your own works. Not quite sure how you would do this, however, I hereby give thanks to Wellington City Council for making this information freely available.
It is also clearly stated that:
"...WCC generalised the contours by up to 0.2m in order to reduce the number of vertices in the dataset. Contours generated from LiDAR and
photogrammetry should not be used for detailed engineering design."
To me this means that this info is great for planning purposes but for any detailed design work, always go to a registered surveyor.
Boundaries
I quiet often get the site boundary information by adding the NZ Cadastral Parcel Polygons from the Cadastral and Property Category. This information is not free but the cost is typically less than $2 for a typical property.

Crop to your site
The map panel on the right hand side displays all the information you have selected. Search for your specific address or zoom and pan with the mouse.Hit the Set a Crop tool to place a crop region around the desired area. It is a good idea to get a slightly bigger area that you will actually need so that you get enough countour information to generate a good topo surface in Revit for the entire site.
Remember that Revit can only handle projects smaller than 23 miles in radius.

Download
To download the information in your crop region, hit the Download or Order button at the top right. Select Internet Download and CAD (.dwg) option. Make sure the map projection is set to NZGD2000/New Zealand Transverse Mercator 2000 (EPSG:2193).

See how to use this information in the next post: Creating a Topo Surface and Boundary Lines in Revit from imported survey Information.

